|
||

Here's a sketch showing the back view of the lenses. The notch that decides which camera the lens fits on is indicated at arrows (1) and (2). The third lens mount shown in the sketch is interesting: this is an Accura 2X tele converter, which was sold to fit both cameras in the 1960s. It was designed to fit both bodies and accept both sets of lenses, so it can be used as a two-way lens adapter. Before I found this, I hadn't even realized that there had been a teleconverter for either of these cameras. 
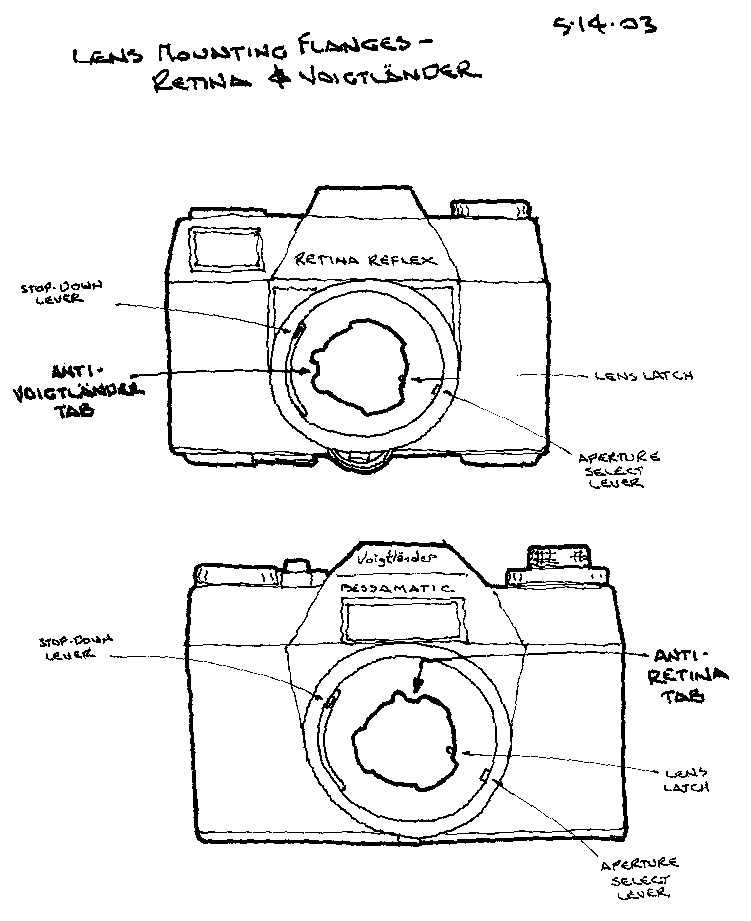
Here are the corresponding details in the camera bodies. The tabs fit into the notches in the lens bayonets as you set the lens in place. 
To defeat the lockout, you can either grind the tab off of the camera body mount, or grind a new notch into the lens bayonet. I chose the lens, mainly because it was a little quicker and more easily accessible than taking the bayonet off of the camera body (and I didn't want the shutter full of metal dust, so I didn't want to work on the mount without removing it from the camera). Once you have the 1mm and 7mm points marked on the edge of the bayonet prong, simply place a 16mm diameter object (a PX625 battery works great) so that it crosses the edge just at those marks and trace around it... then grind the prong away until you reach the mark. For a tool I used a cordless Dremel grinder with an 8mm diamond-grit cylinder, and it worked very well. There is also a 15mm sanding drum which should work too. After you're finished, there will be a small burr which you'll want to remove with a half round needle file.   
Here's the end result: Original Voigtlander lens on top, Retina lens in the center, and on the bottom is a Retina Tele Xenar with the Voigtlander notch added. Took about 5 minutes, works like a charm. |
||
|
|
||
|
|
||
|
|
||
|
|
||
|
|
||
|
|
||
|
|
||
|
